Adjustable Torque Driver Instruction Guide for 2 – 10 in-lbs
by
IDEX Health & Science
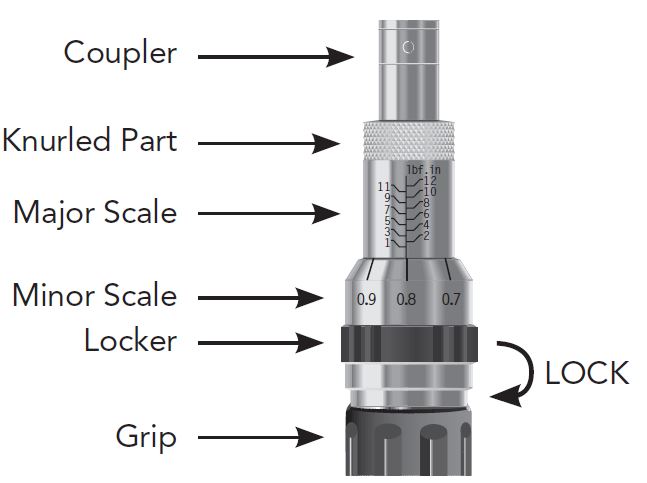
Please see diagram to the left for assistance:
- The torque is set to the minimum scale for shipment. To adjust, first turn the locker counter-clockwise to release lock. There will be a click and looking from the point of view of the handle, you’ll see a white dot on the locker that will be aligned with the “Free” lock point.
- Holding the knurled part of the scale, turn the handle clockwise or counter-clockwise until the desired torque is reached. The vertical line corresponding to the desired minor scale value should be lined up with the vertical torque line of the major scale, at or past the desired major scale value.
- After setting the torque, turn the locker nut clockwise to the “Lock” position.
- Insert the extender tool with hex drive all the way into the coupler.
- Attach the extender tool to the head of the fitting.
- Start tightening operation. Stop tightening when you hear a click.
- Remove extender tool from the fitting.
Please Note: This driver is to be used for tightening only. It is not designed for loosening. Do not use the torque driver beyond the maximum torque setting or below minimum torque setting.